
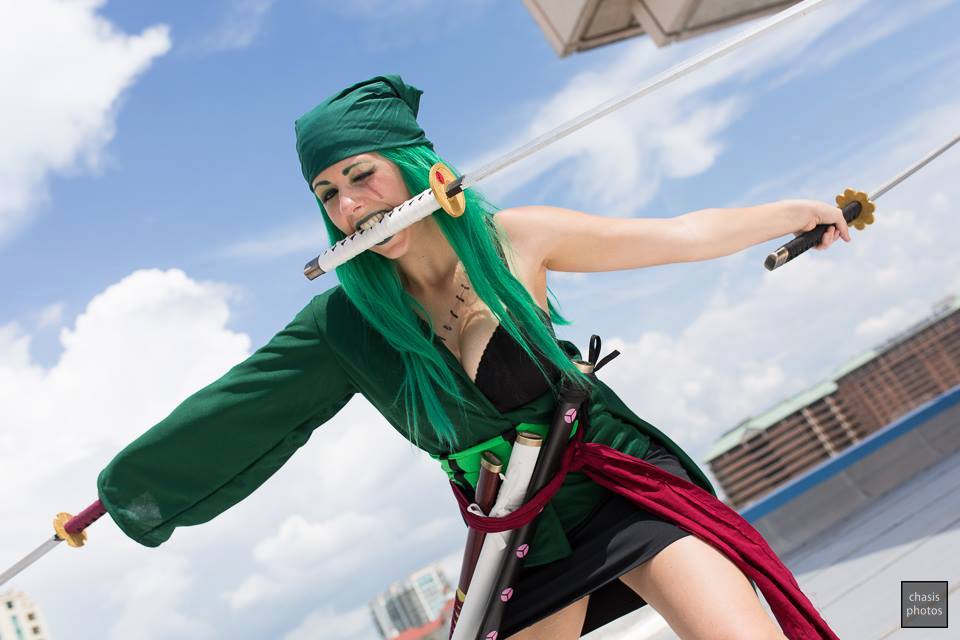


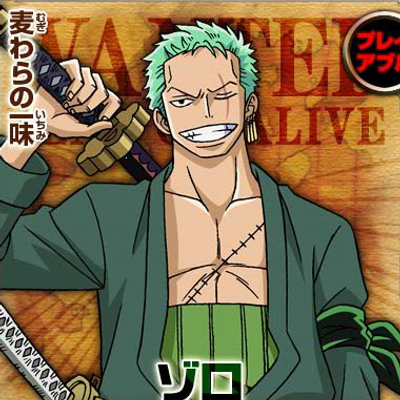
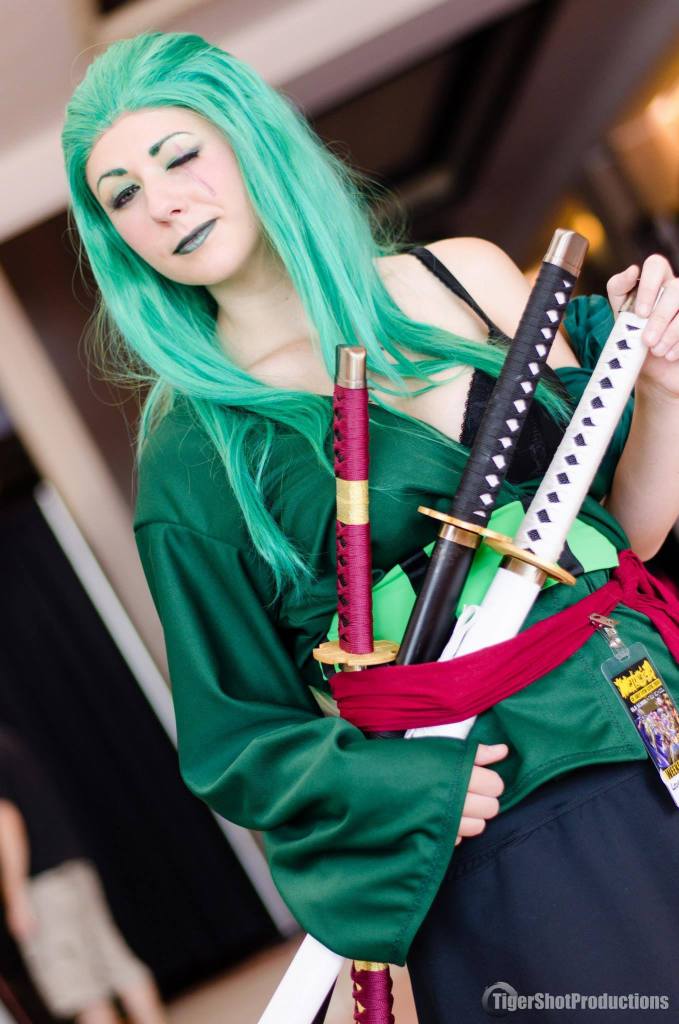
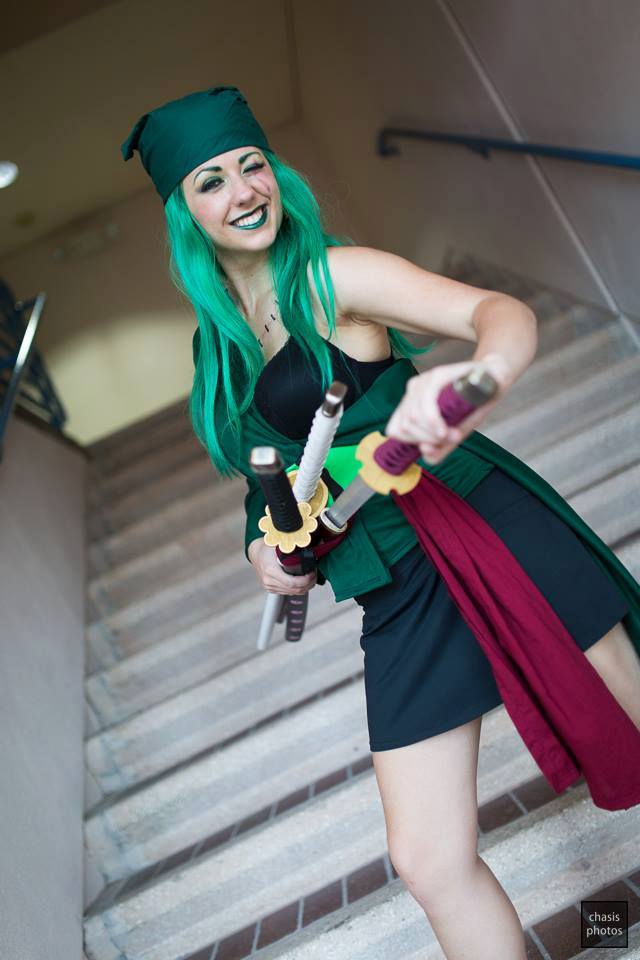
Genderbend Zoro cosplay by me!
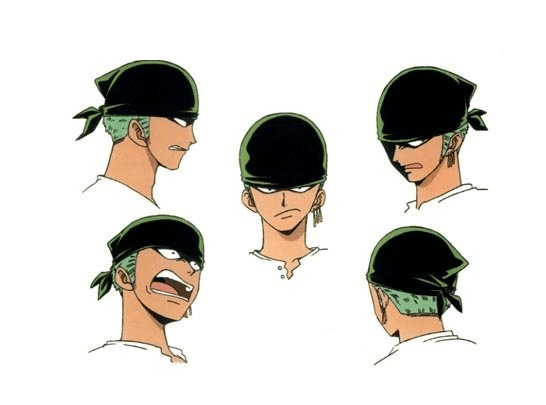
Design inspirations:

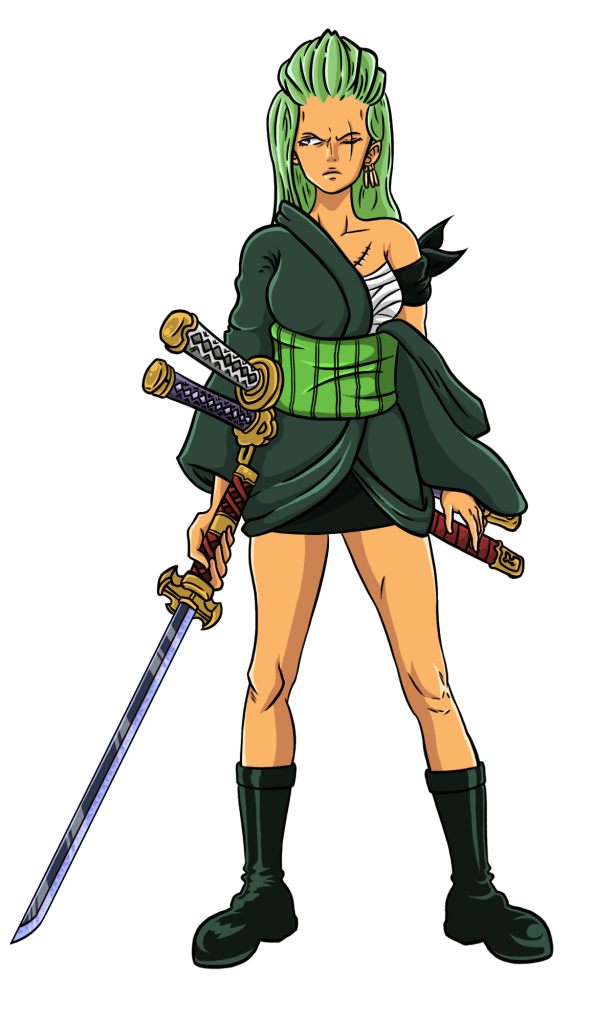
Credit to the design images sources:
http://cromarlimo.deviantart.com/art/Zoriko-364290395
http://brendalai.deviantart.com/art/One-piece-gender-switch-Zoro-x-Sanji-x-Luffy-336017963
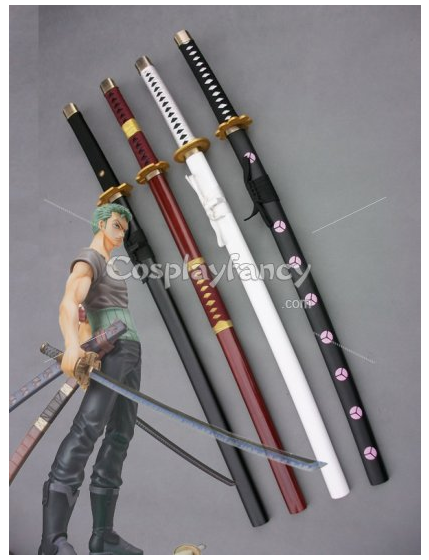
Swords were purchased from Cosplayfancy.com, but you can find them on Amazon.
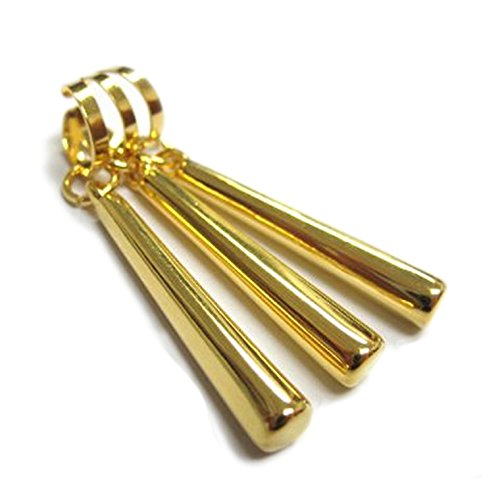
Zoro’s Boots were purchased on Ebay and the gold earring was purchased on Amazon. I wanted to make sure they were a Hunter Green Swede. And I wore a generic black bra.

Here’s how I made the outfit! For the jacket and skorts (skirt and shorts), I actually used an old pattern I had and I didn’t document it very well. So my apologies. The jacket was a dark green double knit and the skorts were made from black active-wear fabric. You could use some old clothes and seam rip them or here are some patterns you can use!
Patterns you can use:
Easy 2022 Pattern Robe Karate Gi Unisex Costume Size XL.
Women Skort DIY Pattern
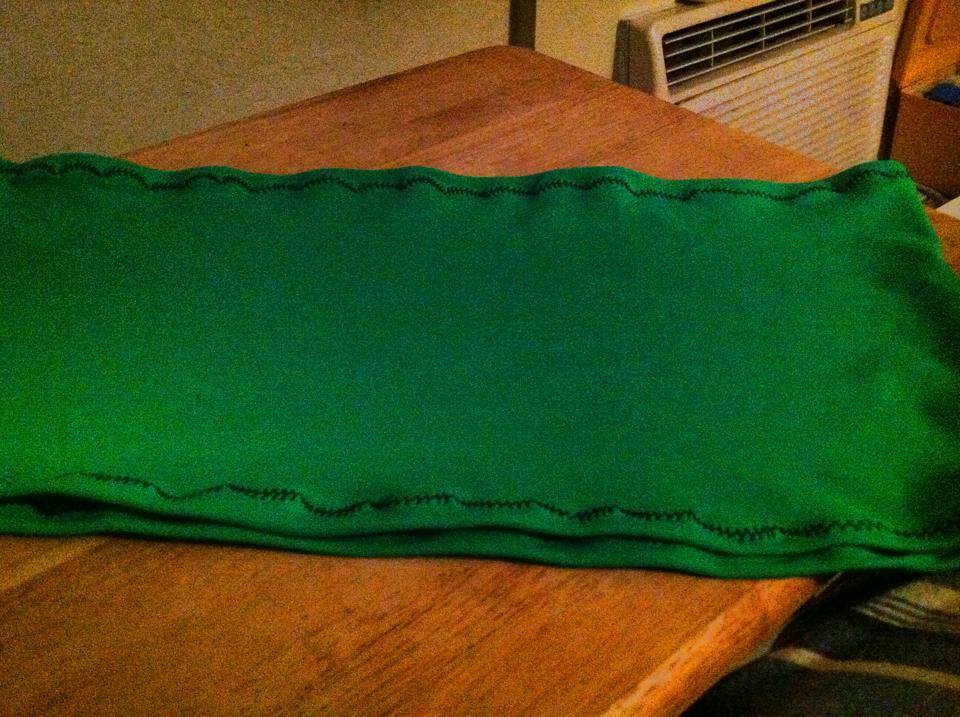
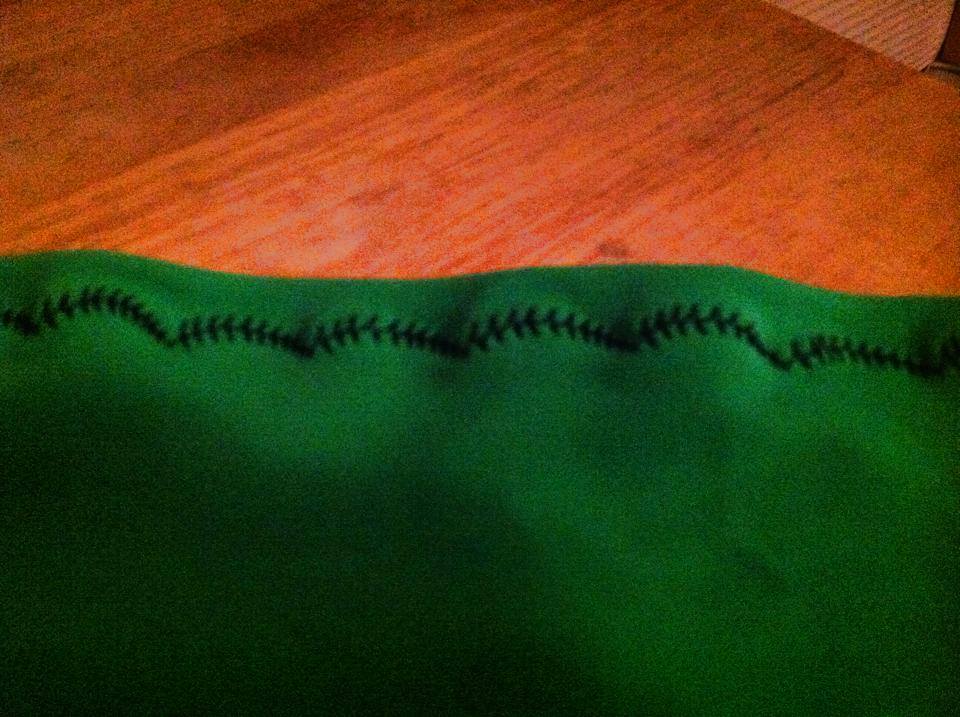
The maroon red sash was made form left over fabric. It was two yards wide with an inch seam allowance I sewed over. Very simple to make. I just tied it around my waist. When making a sash, I do recommend that you sew a “double folded hem. With this hem, the fabric is folded over twice. This completely encloses the cut edge of the fabric so that it prevents your fabric from fraying.
The stomach wrap was from leftover Light Green Active-wear Fabric and some 1 inch grosgrain black ribbon. The same fabric I used for my Little Mac shorts. I used a fancy stretchy leaf top stitch on my machine (you can just use a zigzag stitch or a stretchy straight top stitch), but in the end the detail was so small no one noticed. The black grosgrain ribbon was just regularly stitched on with a straight top stitch.
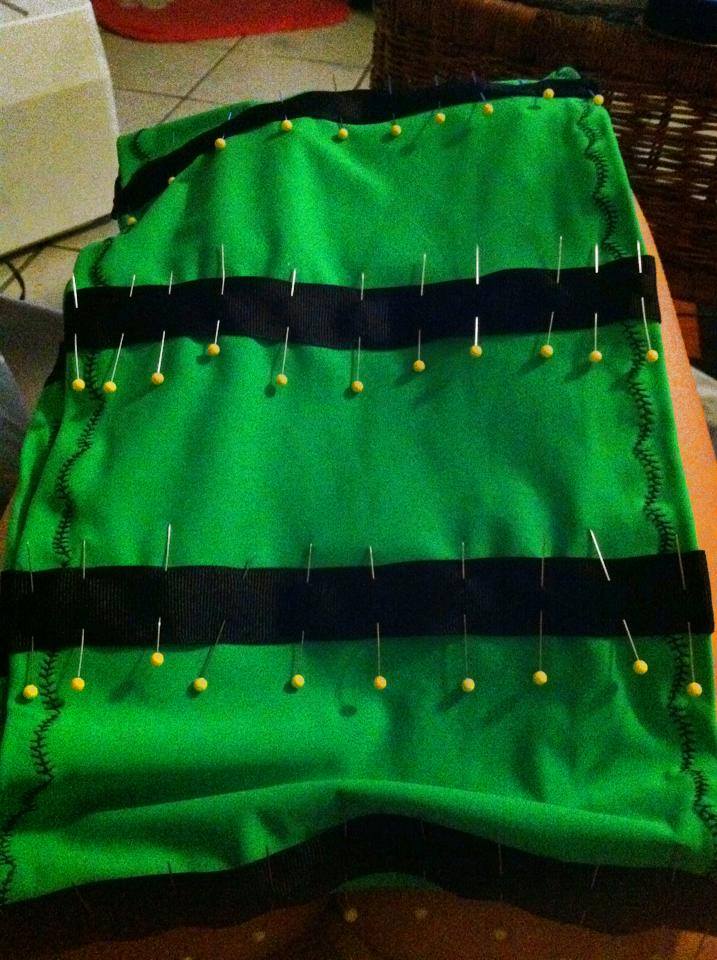

I made the initial mistake of making the wrap too big, so I had to take it in which really threw off my carefully planned lines. I actually learned a lot in the process of making this outfit. One being that when making waistbands… Velcro is your friend. Lol…
Let’s talk about makeup and contacts for a quick second. Zoro has green eyes… I have green eyes… So no contacts. But if I had to recommend a pair, I’d definitely go with Pinky Paradise EOS Dolly Green.

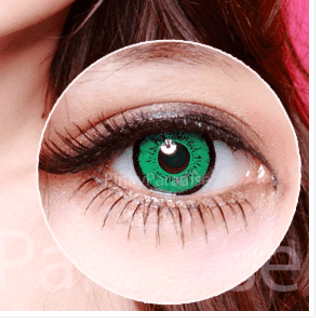

I used these contacts for my Ame-Comi Catwoman later on down the road because I wanted something much bolder than my natural eye color. Also, if you do order from Pinky Paradise use the code “leapinglizardcosplay” to get a free gift with your order! 😀
Okay before I start any of my make up I always get my contacts in. I first apply my makeup in this order (I’ll link the ones I use… BUT, I MUST STRESS, YOU CAN USE WHAT YOU ARE COMFORTABLE WITH!!!):
- Base Concealer: *NOTE* I use a yellow concealer for under my eyes to remove purple bags under my eyes and a green one on top of any red pimples or blemishes I have on my face, and any odd spots another concealer that matches my skin tone.
- Foundation Primer
- Foundation
- Powder in matching foundation.
- Makeup setting powder.
Now I get started on the eyebrows! For my green eyebrows I used the following:
- NYX Cosmetics Jumbo Eye Pencil Milk
- NYX Cosmetics Jumbo Eye Pencil Rocky Mountain Green
- NYX Cosmetics Jumbo Eye Pencil Sharpener
- Matching Green eye-shadow powder generic cheap stuff from the drugstore.(I actually bought this palette and it covers all of my crazy colors for the future.)
- Eyebrow brush
- Q-Tips for cleanup (I like the precision tip ones)
I do my eyebrows a little different from most people. But I can spend easily 45 mins to an hour getting them just the way I like. I do them a couple of different ways, but the way I did these green eyebrows was by first going heavily over them with the NYX milk pencil. Then on top with the Rocky Mountain Green. Once they are the right color, I comb them out and set with a matching powder. Heads up… They look gross at this point. (Going to use my Officer Jenny progress shots for the time being.)
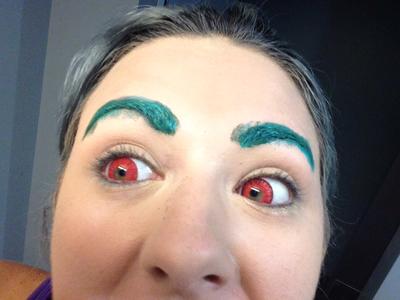
Now they will look messy, very messy, but this is where the Q-Tips come into play.
*NOTE* You can use makeup remover or not if you’d like on the Q-Tip. I only do in cases of severe f**k ups. 🙂
I very carefully clean them up until they are “on fleek” as the kids say nowadays. Lol… After cleaning them up with the Q-Tips and remove the excess poop colors… You get…
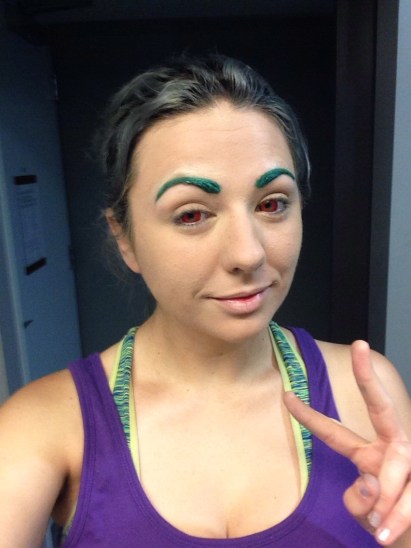
At this point, I’m ready for eyeshadow primer (I use Urban Decay Eyeshadow Primer), I’m a fan of smokey eyes, so I did a green one for Zoro. I usually use 3-4 colors for my smokey eyes with the darkest colors on the outside and in the eye crease, blended into the lightest at my tear duct.
*Reminder* These pics again are for Officer Jenny and as a result I have a blue smokey eye, so ignore that part. 😀
Here is what I look like with my smokey eyeshadow applied:

I know it looks a little crazy, but trust the process, it’ll come together. I like big elaborate looks for my false lashes so I generally go big with my smokey eyes. RuPaul is my Patronus.
The next steps I take are in order (I’ll link the products I use):
- Black eyeliner applied. (I’ve linked my favorite brand.)
- Curl eyelashes.
- Then falsies (top and bottom.) Sometimes I wear two pairs of tops.*NOTE* Trim your lashes to fit your eyes correctly with some tiny beauty scissors before applying the lash glue.
- Curl eyelashes again with lashes on. Be careful in this step
- Another coat of black eyeliner to fix any mistakes from lashes. I go across the top and bottom.
- Set with mascara. EYES ARE DONE!
Next I continue my makeup by doing the following steps.(I’ll link what I use again! :D)
- Blush or Bronzer.
- Contour Kit (here is the beginner kit I use).
- Highlighter.
- Lipstick/lipstain/lipgloss last. For Zoro I used Lime Crimes Seperntina.
- Setting Spray.
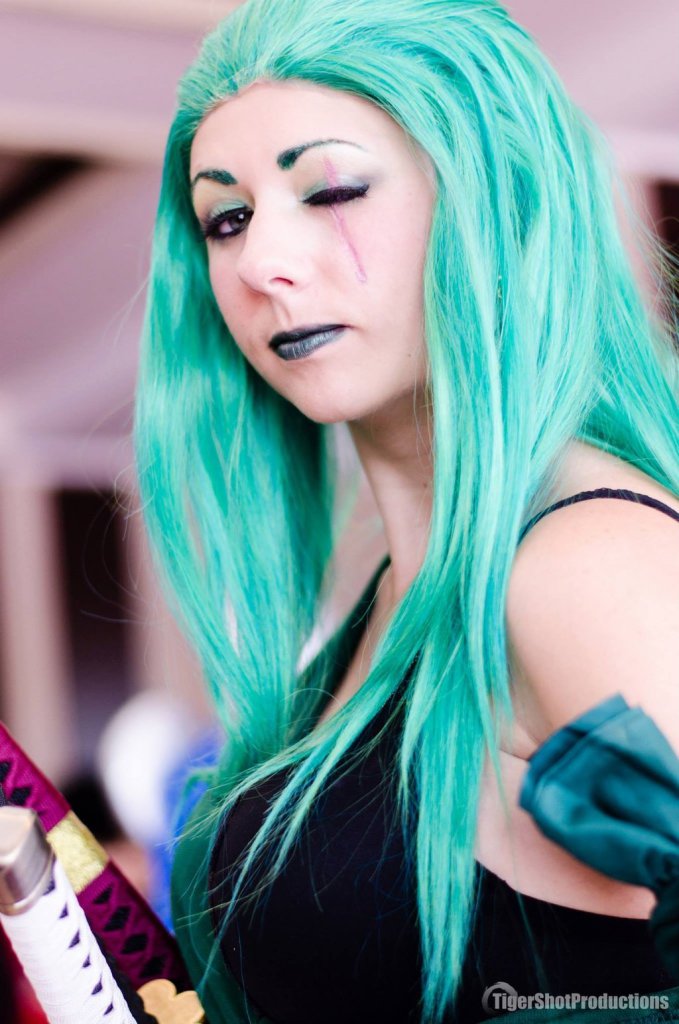
And then done! Here is the finished makeup look after the touches above.
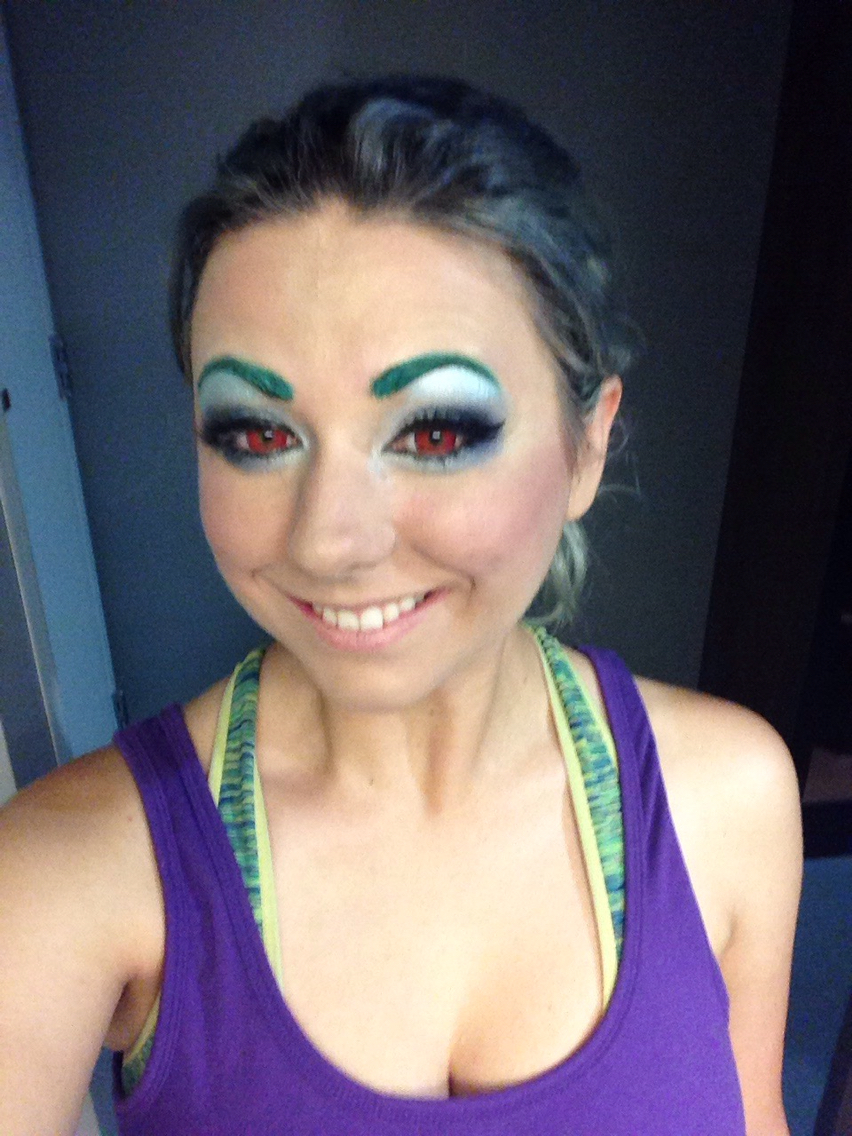
One Final step… The scar….
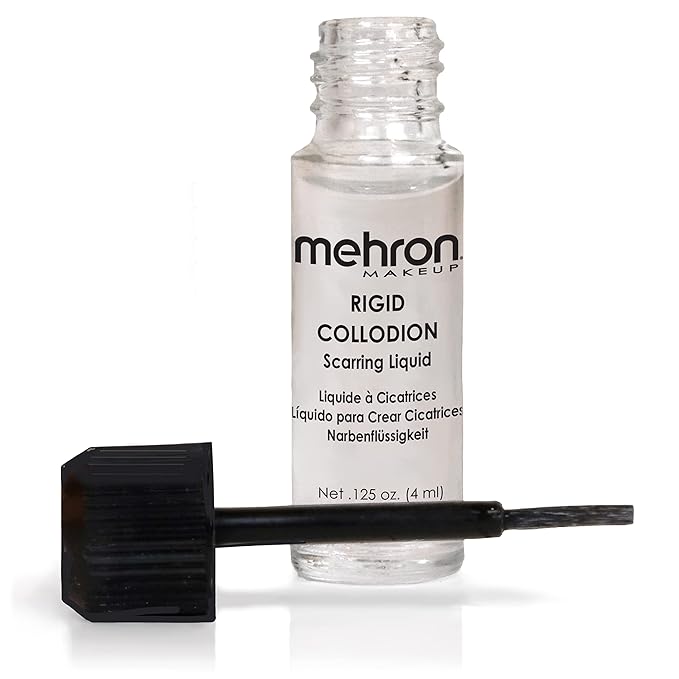
One special trait Zoro has is the scar on his left eye. Since I did the time skip version, it was a must to have this. I used Rigid Collider and some pink and brown eyeshadows to create it. It took me about 3 coats, which I let each one sit for about 5 minutes. *NOTE* Be very careful around your eyes.
This might seem repetitive to say, but since his eye is closed, I recommend doing this with your eye closed and not open because your eye will be closed and you can see the finished product ahead of time. I actually applied this with my eye open and when I closed it it gave the effect of bending inward as you see below. (We all make mistakes right?)
After the 3 coats dried it looked a little funny, so I went in and settled it with a light pink eye shadow to give it a more realistic look. I then went around the edges with a slightly darker pink and tan brown to give it a shadowed 3D effect. I repeated the same for the scar across my chest and just added black eyeliner lines to look like stitches.

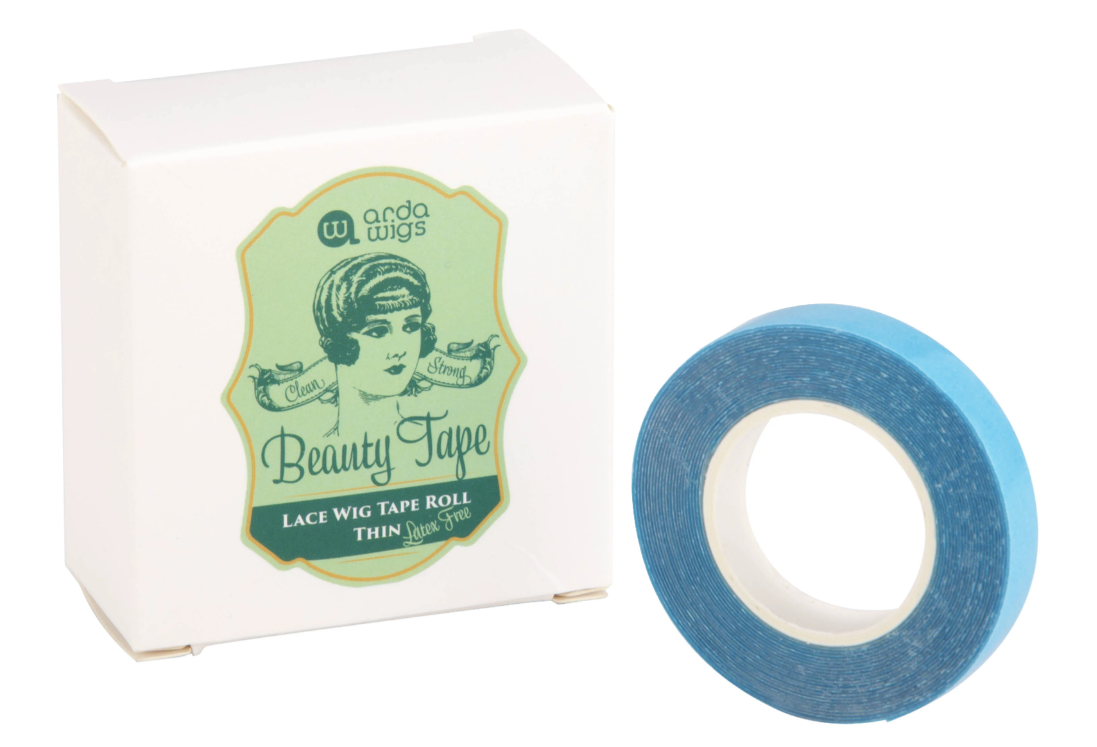
Afterwards I apply my nylon wig cap. I always pin that bad boy down with a million bobby pins. And then my wig on top with the Toupee tape. This actually destroys my wig caps after one use, but I buy them cheap in bulk here.
NOTE: in your emergency kit, make sure if you are using a lace front wig, to have some extra toupee tape, hair spray, hair ties, and bobby pins on hand to keep your wig looking fresh throughout the day.
I ended up using two different wigs for two different shoots. My first wig was a Lace Front Matilda in Emerald Green from Arda Wigs.
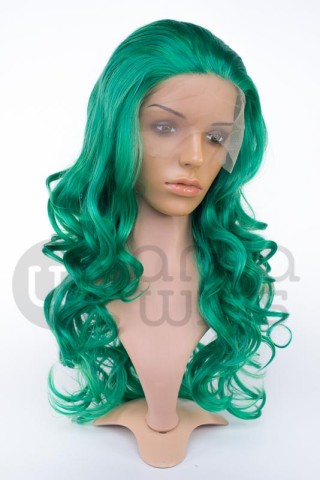
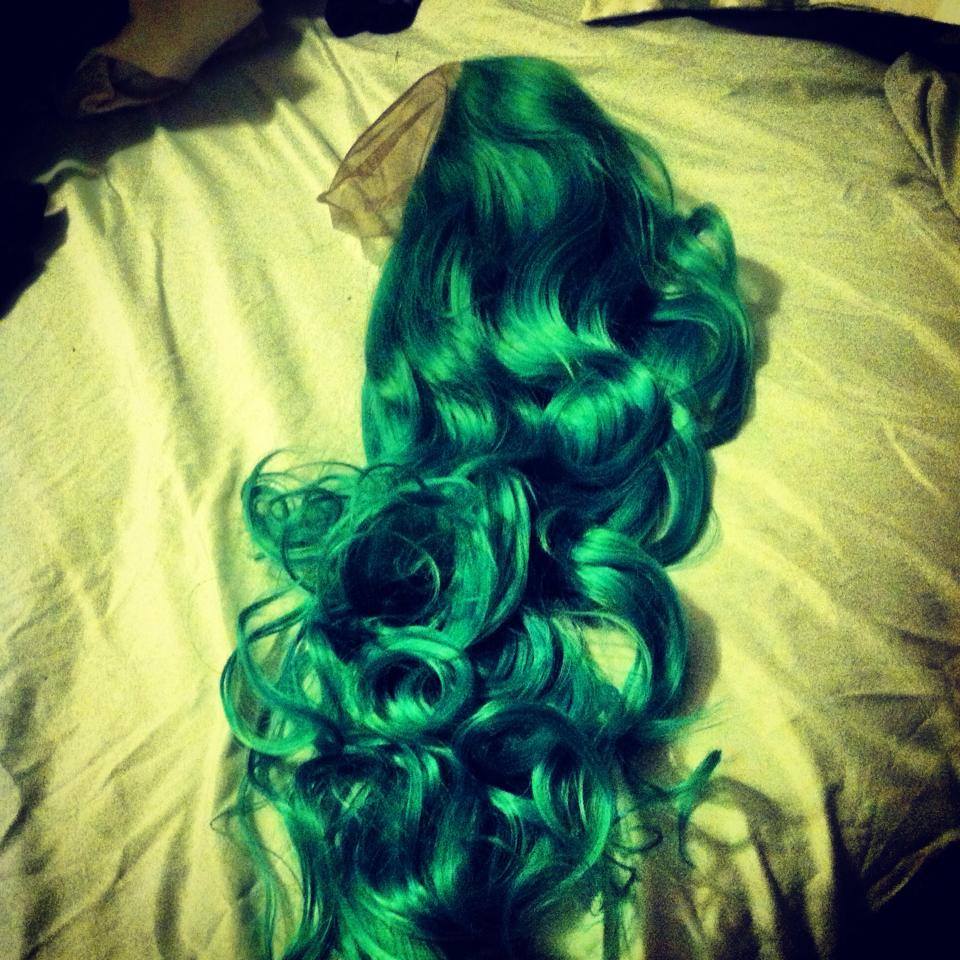
As you can see, it’s very curly, but in my final shot it’s straight. I used a hair straightener on the lowest heat setting and straightened out those long curls. I also used lace front tape (aka toupee tape) to keep the hairline straight and stuck onto my head.
That said, a funny thing did happen… While shooting I kept jumping around and doing actions shots and my hairline came lose! I quickly took the bandanna wrap I made with some leftover green scrap fabric (which I used from an old bed sheet… *^*) and covered up my head for the rest of the day! This was because I completely forgot to bring extra toupee tape with me. 😐
Thankfully Zoro wears his headband from time to time this way, so I lucked out! 😀
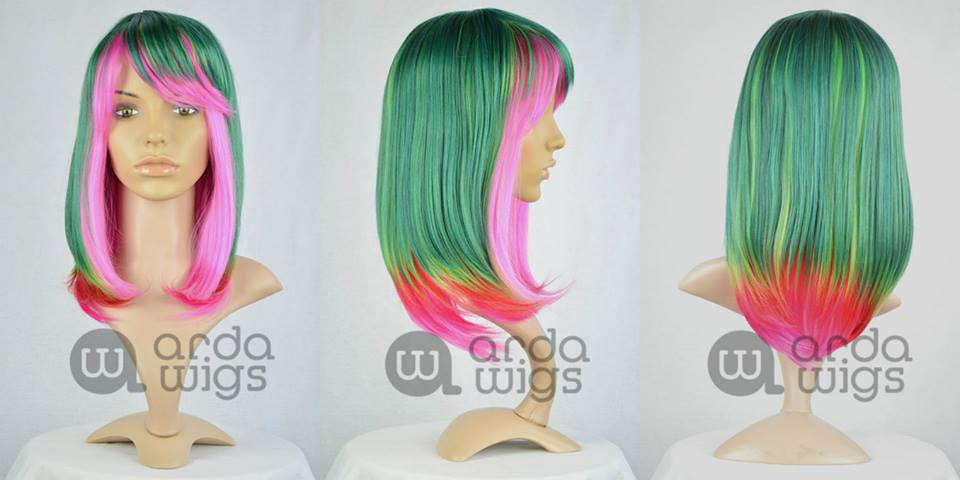
The second wig I used was a limited release from Arda. One of their amazing seasonal wigs that I had borrowed it from a friend. I hope they do bring it back one day. It was called Watermelon. (Thank goodness for Google cache for saving the image.)
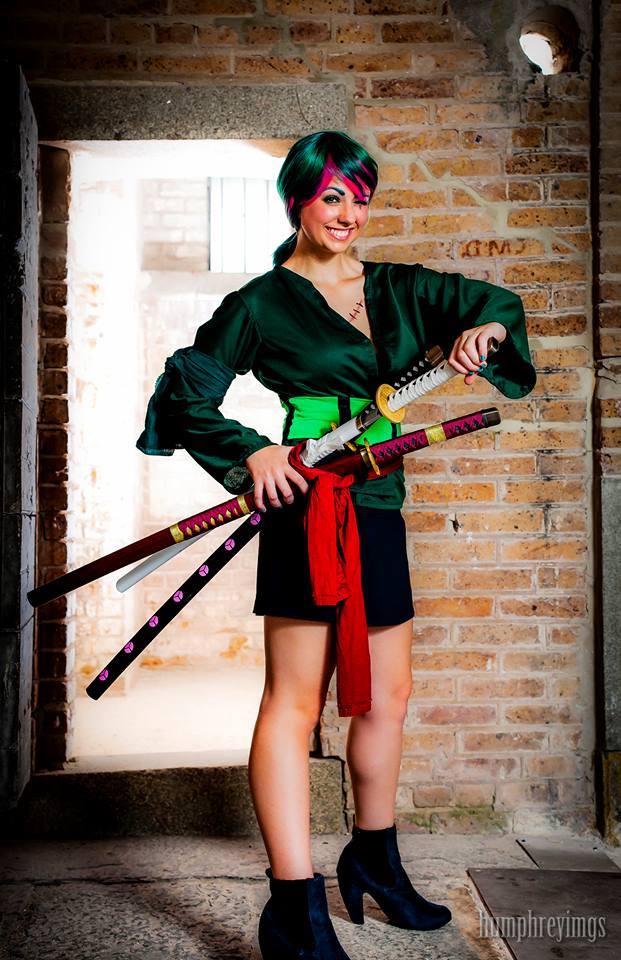
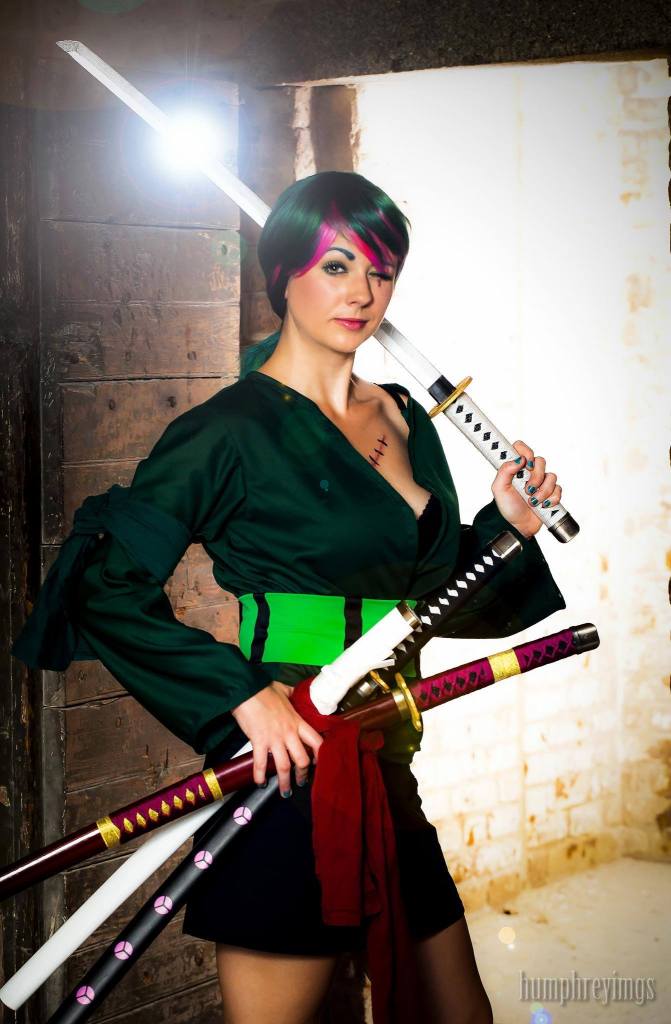
So once the makeup is done, and the wig is set, and the costume on, BAM! Cosplay acquired.
Thanks for reading everyone! That completes my build! 😀
Things I learned after this build:
- Break in your heels and get gel inserts.
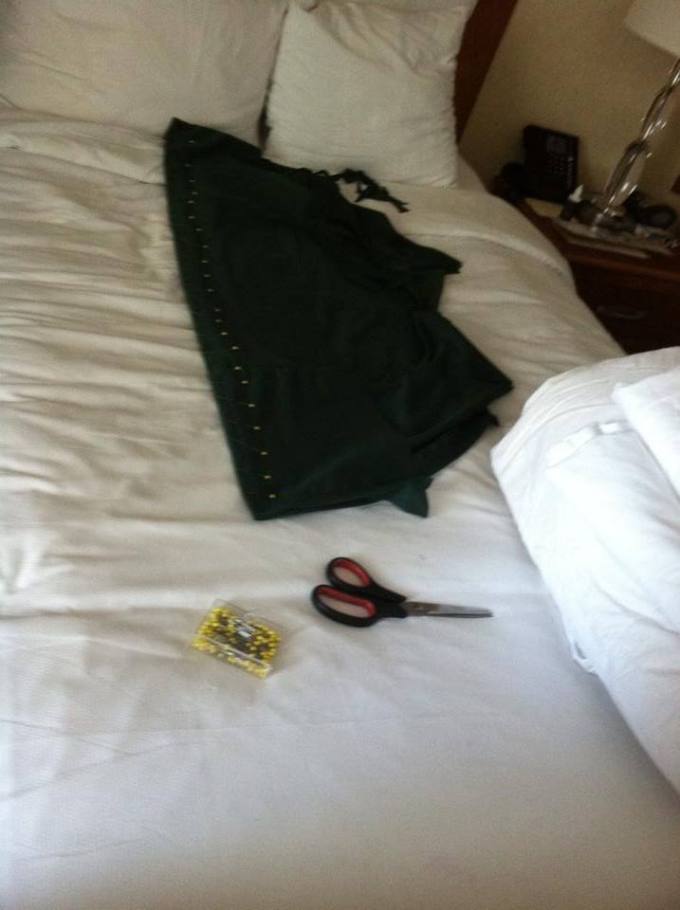
- Don’t sew in the hotel room last minute.
- Carry extra Toupee Tape.
- Heat is not your friend. (Bring some setting powder for your face makeup. Especially in Florida.)
- Drooling over your swords is gross when you put them back in their sheath.
- Smiling is hard with face scars…
- Velcro… NEXT TIME…
I hope you enjoyed this build! Any questions please feel free to ask me at LeapingLizardCosplay@gmail.com
