
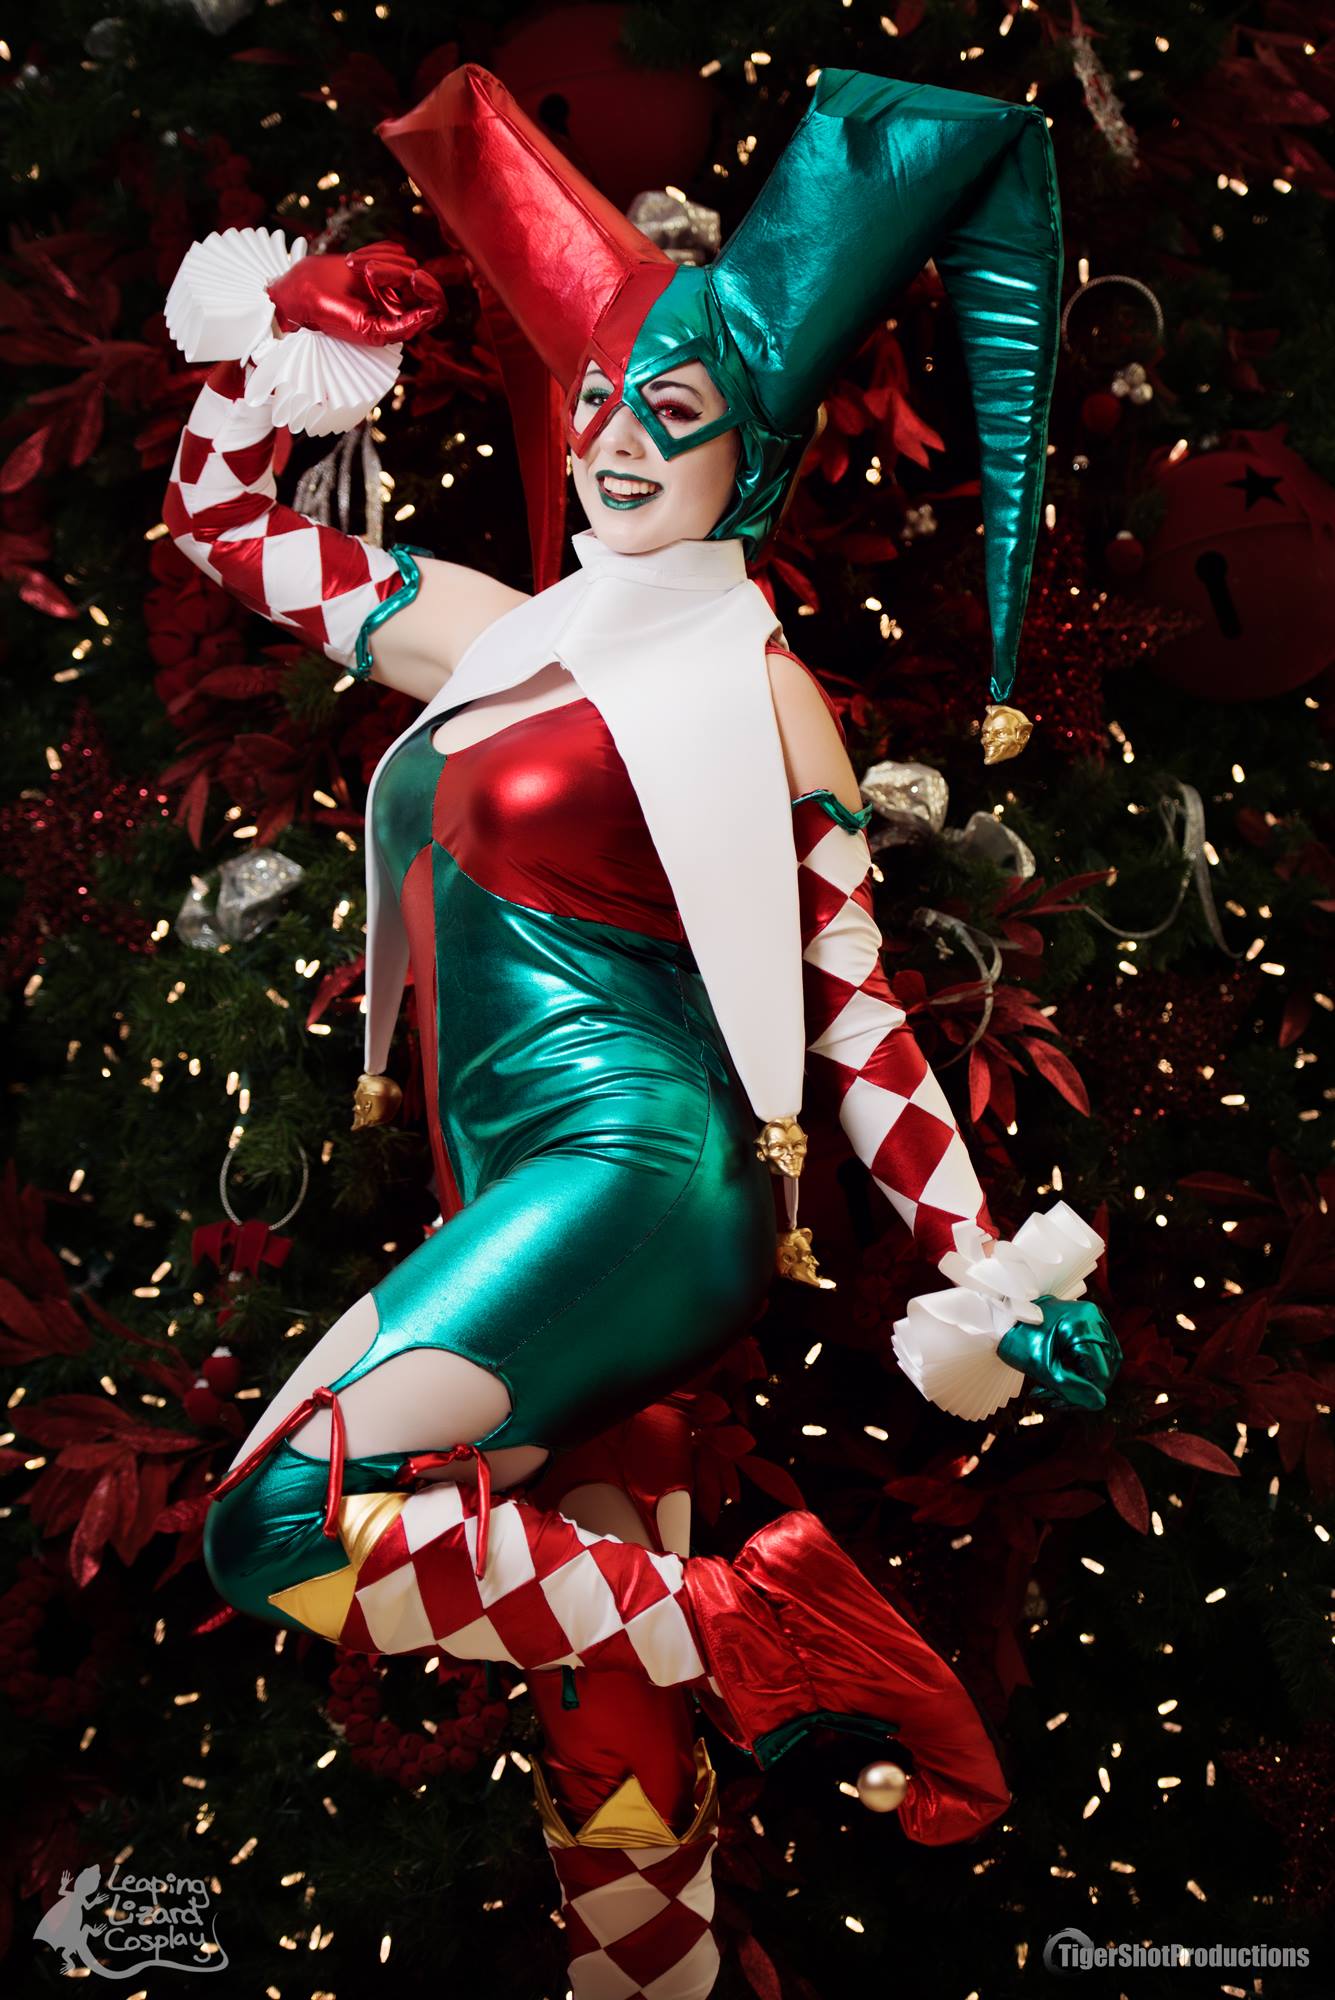
Photo of my Ame-Comi Harley Quinn Holiday Matsuri December 2017 in Orlando, Florida. Photo credits to Tiger Shot Productions.
Materials:
- 3 yards of Green (Went more of a Blue Green for this design) Metallic Spandex
- 3 yards of Red Metallic Spandex
- Anti-Slip Vinyl Non-slip Fabric
- Heavyweight Fusible Interfacing
- Heat N’ Bond
- Upholstery Foam
- Green Thread
- Green Metallic Paint or Green Metallic Sharpie
- Red Thread
- Red Metallic Paint or Red Metallic Sharpie
- Gold Thread
- Gold Metallic Paint or Gold Metallic Sharpie
- White thread
- 2 mm Craft Foam
- Gold Mini Christmas Ornaments
- White Ribbon 2 inches thick.
- Old flat shoes, I can destroy
- 6 Joker Bobble Heads

Tools:
- Shipping tape
- Barge
- Sewing machine (I’ve linked my machine)
- Fabric Scissors (My Scissors)
- Non-Fabric Scissors (I use these)
- Seam Ripper (I like this one becuase the rubber tip helps me collect tiny loose threads)
- Yardstick (I think everyone needs at least one 36 inch ruler)
- Popsicle sticks
- Ventilation mask (To protect you from glue & paint fumes)
- Shatterproof Safety Goggles
- Dremel
Makeup:
- Mehron Clown White Cream
- Mehron Setting Powder (I prefer Neutral to use with other colors)
- Green Metallic Lipstick
- Green and red eyeshadow
- Highlighter can use a bright white glittery eyeshadow
- Fake colored eyelashes
- Foundation ( I personally use Make Up Forever HD)
- Black Eyeliner
- Grey eyeshadow for blush contour on a white face. (This is my favorite smokey eyeshadow palette.)
- Green colored contact
- Red colored contact
♦️♠️ Cosplay Breakdown
Let’s break this cosplay down into parts:
- Bodysuit
- Patterning Bodysuit
- Butt Decal
- Patterning Bodysuit
- Shoes
- Patterning Shoes
- Christmas Ornaments
- Inserting old shoes
- Gloves and cuffs
- Patterning Gloves
- Simple Ribbon Cuffs
- Headpiece
- Patterning Head
- Making “Jester Ears”
- Attaching Ears to the head cap
- Front Mask
- Back Mask
- Neck Collar
- Patterning
- Using 1.5 mm Craft Foam
- Arm and Leg Socks
- Checkers… The ULTIMATE SEWING DEVIL……..
- Makeup
👗 Bodysuit Tutorial – Pt 1: Patterning the Bodysuit
Out of everything I made for this costume, the bodysuit was one of the most straightforward, but it still came with its share of lessons.
I started by buying a bodysuit that already fit me well, then seam-ripped it apart to create my own pattern ✂️. It saved me a ton of time, and honestly, it’s a method I’ll probably use again. I’ve reused that base a few times now, and it’s been a solid foundation for different looks.
At one point, I considered making things more complicated (because why not, right?). I looked into Yaya Han’s bodysuit pattern, which is actually amazing for more customized designs. If you’re more advanced or just want something a little extra, it’s a great option 🧵.
There was also a moment where I tried the “fast track” method: buying a pre-made red and green metallic bodysuit. Spoiler alert: it almost backfired 😬. Matching shades of spandex can be tricky, and once you start cutting, there’s no going back. I ended up having to rework a lot of it because the colors didn’t quite match my additional fabric. Lesson learned: when it comes to pre-mades, proceed with caution.
Harley’s Ame-Comi bodysuit design is more of a corset style, and metallic spandex isn’t great for structure. So I tweaked the pattern to add shoulder straps. Being a bustier gal, strapless wasn’t going to cut it for me, it just wouldn’t hold up. I did consider adding eyelets for a true corset effect, but you can’t really do that with stretch fabric. I figured out that if you really want to, you can use interfacing behind the eyelets, but just know that area won’t stretch—and it can pull in weird ways if you’re not careful.
I traced Harley’s pattern onto my red and green fabric, gave myself an extra inch around the edges for seam allowance, and clipped everything in place with small binder clips (no pins, learned that the hard way on other projects). I kept the seams unfinished and stitched it together with a triple straight stitch. Simple, but it worked ✅.
The final fitting process involved turning the suit inside out, putting it on, and using metallic markers to mark where it needed to be taken in 🎯. Not gonna lie, that part was a bit of a circus, metallic spandex doesn’t forgive easily. If you’re working with vinyl, it’s even trickier. Take it in too much, and you end up with tiny holes. I definitely prefer to make multiple small adjustments instead of trying to nail it all in one go.
Looking back, it wasn’t perfect, but it held together, fit well, and I learned a lot in the process. That’s really all I can ask for 💪.
So with that, let me try and break this bodysuit down into a tutorial for you geckos.
🔰 For Beginners:
The easiest way to make a bodysuit is to:
- Buy a bodysuit that fits your measurements ✅
- Seam-rip it apart to use as a custom pattern ✂️
This method is great because:
- It’s fast ⚡
- You can reuse the base for future projects ♻️
- The construction is relatively simple compared to other costume pieces 🧵
🧵 For Intermediate to Advanced Sewists:
IIf you’re comfortable with sewing and want more flexibility in your design, this is where things get fun.
Check out Yaya Han’s Bodysuit Pattern🧶. Tt’s designed specifically with cosplay in mind and works well for more complex builds. The pattern is highly modular, meaning you can tweak the neckline, sleeves, leg cuts, and more to match your character’s design 🎭. It’s also great for working with stretch fabrics like spandex or milliskin.
What I liked most is that it doesn’t lock you into a specific look — you can mix and match pieces or modify the fit without starting from scratch. Whether you’re going for sleek superhero lines or something more stylized, it gives you the structure to get creative 🎨✂️.
It’s a solid step up if you’re past the beginner phase and ready to build something that really fits your vision.
⚡ Fast Track Option:
If you’re short on time (or patience), you can go the fast route: Buy a pre-made red and green metallic bodysuit 🟥🟩
This can save you a ton of time up front—but it comes with some serious trade-offs.
🚨 BEWARE!
- The shade of your 4-way stretch metallic spandex may not match the bodysuit
- No extra fabric means no room for error—mistakes = irreversible 🚫
- You’ll need to cut, butcher, and resew the suit to fit your design 🧷
✨ Design Tips:
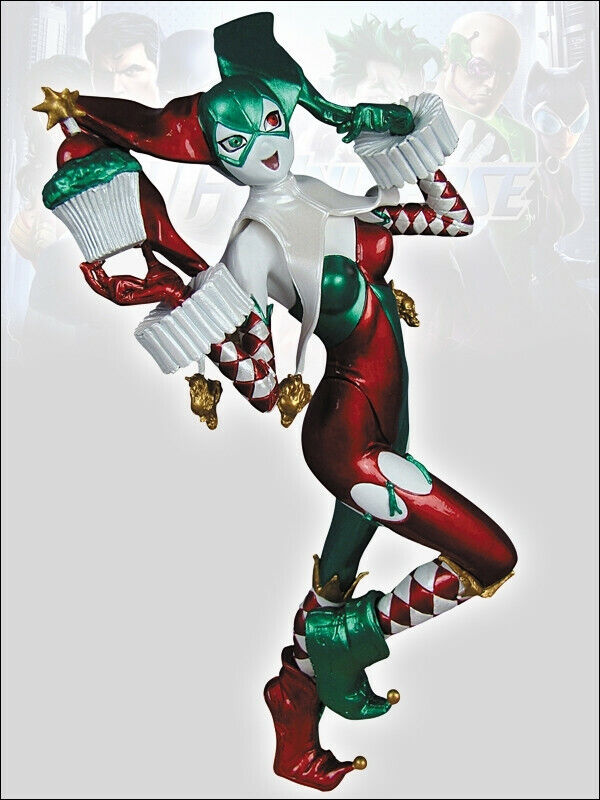
Harley’s Ame-Comi design is technically a bodysuit with a corset-style top 🎭
My version:
- I used metallic spandex (not ideal for bust support)
- Added shoulder straps for more coverage (especially for bustier figures) 👙
- Corset-style design would require eyelets in the back—but eyelets and stretch fabric don’t mix ❌
👀 Pro Tip:
Thinking about adding eyelets for a corset-style detail or lacing effect? It can be done—but only if you do it right.
Stretch fabric on its own won’t hold eyelets. They’ll just pop out the moment you move or tug on them—not ideal during a con or photoshoot 😩. To make it work, you’ll need to reinforce the area.
📏 Here’s how:
Use a layer of stiff interfacing behind the section where you want the eyelets. This gives the fabric enough structure to hold the metal in place without ripping or warping.
But be warned:
🔸 Only do this on 4-way stretch fabric. It’s flexible enough to handle the added tension and movement.
🔸 2-way stretch is too stiff in one direction and will likely cause the fabric to pucker, warp, or pull unevenly 😬.
Also keep in mind: once you add interfacing, that section won’t stretch—so make sure the suit still fits properly with that reduced flexibility. It can throw off the balance if you’re not careful.
If done right, though? It looks amazing and adds a real, tailored touch to your costume ✨.
🧩 Translating Harley’s Pattern
Harley’s suit has a distinct pattern on both the front and back—it’s part of what makes her Ame-Comi design so striking. To replicate it accurately, I used my old bodysuit as a mock-up. It was already shaped to my body, so it gave me a solid base to work from.
I traced the design directly onto my red and green metallic stretch fabric, paying close attention to symmetry and line placement. Once everything was laid out, I added 1 inch of seam allowance around all the edges 📐—a little extra room is always better than not enough, especially with stretch fabric that can shift during sewing.
📎 Assembly Tips
Here’s what worked best for me during construction:
- Avoid pins—they can leave visible holes or even tear metallic spandex. Instead, use small binder clips to hold your pieces together 💡.
- Sew with a triple straight stitch. It gives extra strength and stretch without popping seams mid-wear 💪.
- I left the seams unfinished. The fabric doesn’t fray, and it helped keep the suit flexible and smooth when worn 🌀.
This approach made the whole process faster and cleaner—and most importantly, the suit held up beautifully.
🎯 Special Note – Sewing with Vinyl
Vinyl can be a beautiful material to work with—but it’s completely unforgiving when it comes to mistakes.
🪡 Always give yourself extra seam allowance. You can take it in gradually, but once you stitch vinyl, every hole is permanent. If you go too far, you’ll be left with visible punctures—and there’s no real way to hide them 😩.
The golden rule? Sew with the mindset of adjusting later, not aiming for a perfect fit on the first pass. ✔️
I’d rather make a few safe passes than ruin an entire piece by being overconfident with the fit.
Patience pays off with vinyl—trust me on that.
👚 Final Fit
Once the bodysuit was assembled, it was time for the part that makes or breaks the final look: the fit.
I turned the suit inside out, put it on, and used metallic markers to mark where it needed to be taken in 🖊️. It’s a bit awkward, especially with stretch fabric that doesn’t always behave—but it’s worth doing carefully.
👯 Pro tip: If you’re new to this, get a friend to help. It’s tough to reach and pin accurately on your own, and a second pair of eyes can save you from weird puckering or asymmetry.
I tried the suit on multiple times, switching between inside-out and right-side-up 🔁. That helped me make sure the fit was clean from all angles before committing to the final seams.
The key? Take it in slowly. It’s tempting to just go for it, but with materials like vinyl or metallic spandex, one wrong stitch can leave a permanent mark. Better safe than sorry 🧠.
🧝♂️ Shoes – Pt. 2 DIY Elf Shoes Tutorial
Looking back, making the elf shoes was actually the simplest part of the entire costume 👣. At first, I expected it to be tricky—getting the shape right, dealing with curled toes, making them wearable. But once I started, everything came together quickly 🎯.
Patterning the shoe shape was straightforward, and using an old pair of flats inside made the construction much easier than expected 🥿✂️. Attaching the small gold ornaments at the tips added a nice touch without much extra effort ✨🎄.
Compared to more complex elements like tailoring bodysuits or working with stretch fabric, this part was surprisingly smooth—and a good reminder that sometimes, the pieces you think will be the hardest turn out to be the most manageable 💡✅.
Honestly, by the end of it, I was halfway convinced I missed my calling as a cobbler. 👞😄
✂️ Step 1: Patterning the Shoes
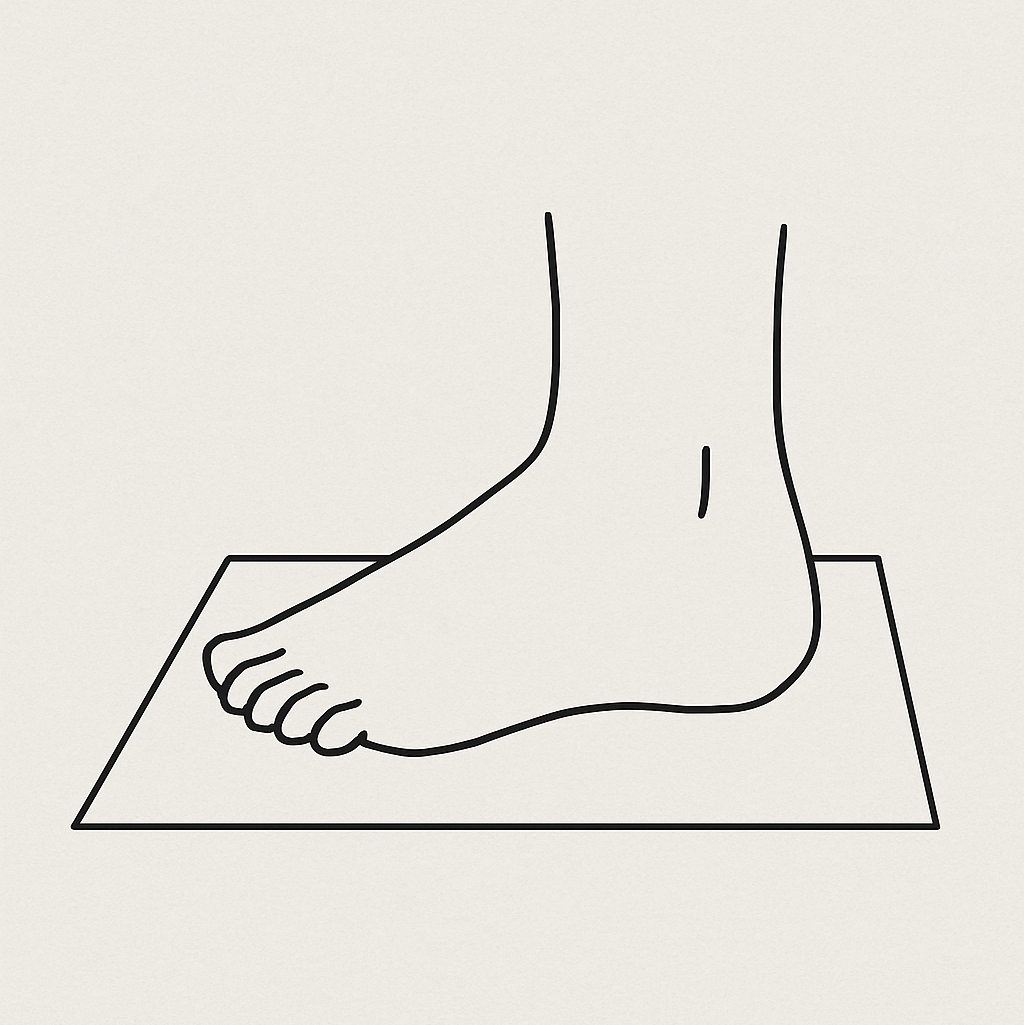
- Trace Your Foot 🦶
Start by placing your foot on a piece of paper or cardstock and tracing around it.
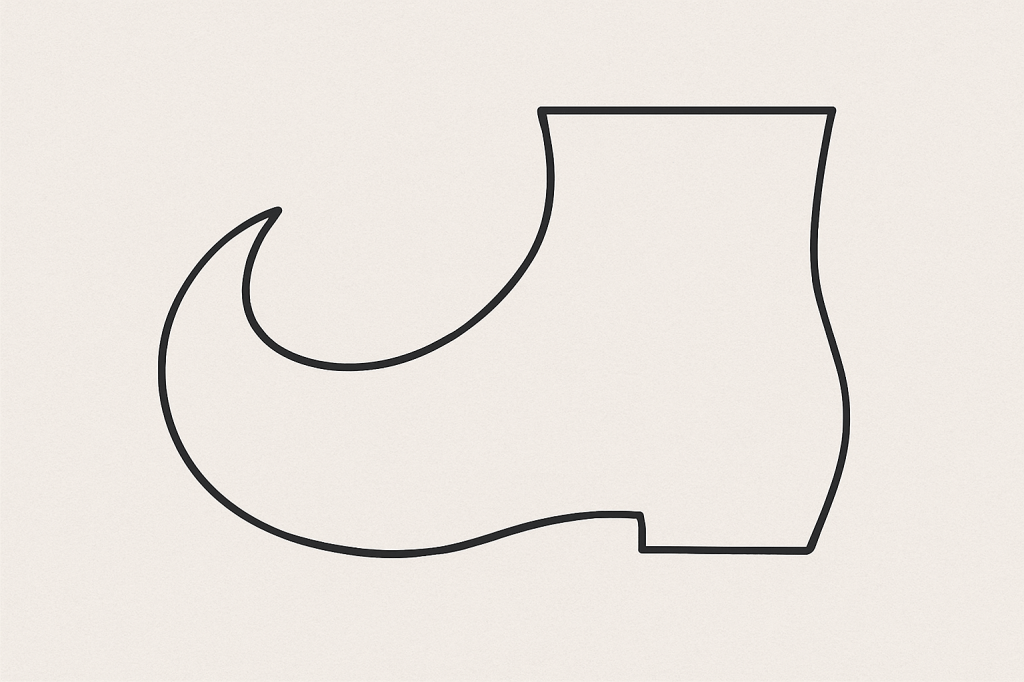
- Design the Elf Shape 🧙♂️
- Extend the toe into a curled point or whimsical curve.
- Add extra space around the traced foot for seam allowance (about 1/2 inch).
- Draw a separate piece for the upper part of the shoe (like a sock or boot top) if you want a high elf boot look.
- Create a Paper Mock-up 📄
- Cut out your pattern pieces (sole and upper).
- Tape them together to test the shape and fit on your foot or a shoe form.
- Make sure the toe curl isn’t too tight or awkward—adjust the curve to your liking.
- Trim or redraw any areas that seem too tight, short, or overly bulky.
- This is your chance to get the cartoon-y proportions just right before cutting expensive material!
- ✂️ Step 3: Cut Your Fabric
- Use metallic stretch vinyl for a shiny, structured outer finish—perfect for Harley’s iconic style.
- Add interfacing to the wrong side of the vinyl to help it hold shape, especially in the curl and ankle.
- If your toe curl is dramatic, lightly stuff it with polyfill to keep it dimensional.
- Cut two mirrored pieces for each foot: one outer and one lining (optional for added durability).
- Make sure to cut the correct color for each foot:
- Left Foot = Red
- Right Foot = Green (or vice versa depending on your version—just be consistent!)
- You can also cut a sole piece out of foam or stiff interfacing to add structure underfoot.
🧦 Step 2: Inserting Old Shoes (for Comfort!)
✨ This is the secret to making elf shoes actually wearable for long con days or stage time! ✨
👟 Grab Old Flats or Slip-Ons
- Use old ballet flats, soft sneakers, or house slippers as the hidden base.
- Make sure they’re low-profile, comfy, and something you’re willing to sacrifice to the cosplay gods.
- Pro tip: Match the base shoe color to your vinyl if possible for clean seams!
🔧 Cut and Insert
- Slide the old shoes into your elf shoe fabric shell before fully sewing shut.
- If needed, trim down the shoe opening or remove insoles to help them fit better inside.
- Use pins or clips to snug the fabric around the shoes, especially around the toe and heel.
- Hot glue or hand-stitch the fabric along the sole edge for a secure hold.
🧵 Sew or Glue Closed
- Once everything is aligned, sew or glue around the back heel seam and toe seam.
- Make sure the seams are tight and reinforced so the shoe doesn’t shift as you walk.
- Add a little hand-stitching or topstitching around any high-stress points for durability.
🎄 Step 3: Adding Tiny Gold Ornaments
🎁 Get Mini Christmas Balls
- Find tiny gold plastic ornaments—the kind used for tabletop trees or garlands.
- Choose ones that are lightweight, hollow, and not made of glass (unless you enjoy chaos and regret).
🌟 Attach to Toes
- Hand Sew each ornament to the curled tips of your elf shoes for that festive Harley flair.
- For extra durability, use strong thread or embroidery floss:
- Loop it through the ornament’s hook or cap.
- Stitch directly into the tip of the fabric curl so it won’t pop off mid-twirl.
🔔 Optional: Add Bells
- Want that classic elf jingle-jangle?
- Add tiny bells to the tips or cuffs for some musical mischief.
- BUT full disclosure?
Bells drive me absolutely insane.
So I skip them. Every time. Harley might be chaotic, but my ears deserve peace. 😅
✅ Final Tips
- Add grip pads or glue dots to the soles for safer walking.
- Use a walking foot on your sewing machine if you’re sewing through layers or using textured fabrics.
- Always try the shoe on during fitting steps to avoid tight or awkward areas.
To be continued as of May 2025.
